Hello Megan Nielsen Diary readers! It’s Sarah with Lace & Pine Designs. I recently shared a dress hack for the Mini Briar, and today I’m showing how to add pockets to the Mini Tania pattern.
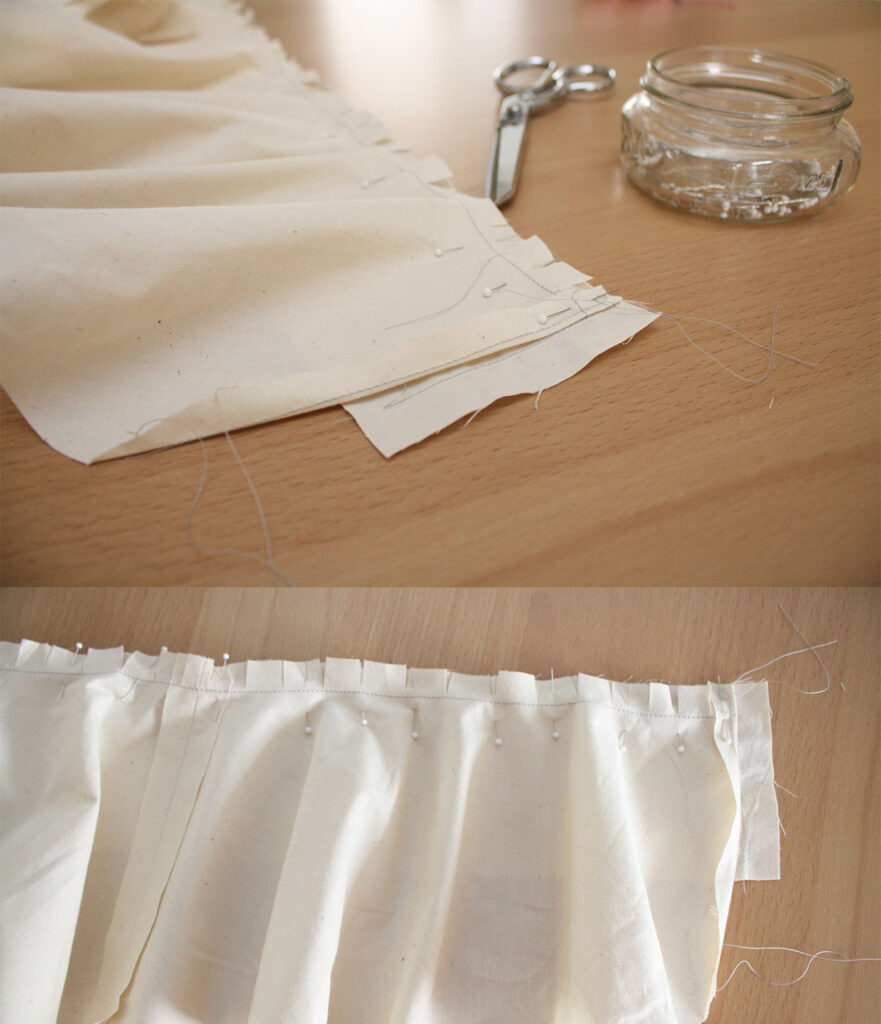
The Mini Tania is a fantastic pattern for little girls. My daughter loves dresses, and putting pants on her is nearly impossible. Now in Kindergarten, she still struggles with modesty and might swing upside down at the park. Culottes are perfect for active girls—they look like a skirt but provide the coverage moms want to avoid accidental underwear flashes. While the Mini Tania is great as-is, I love adding pockets whenever possible. Its side seams make adding pockets extremely easy. You could add a hidden side seam pocket, but I prefer the look of a front-hip pocket. To add these pockets, you’ll make a slight adjustment to the front pattern pieces and create two new pieces for the pocket bag. I’ve created a PDF with the pocket pattern I used for my daughter’s size 4/5 in Version 3. This pattern should work for all Mini Tania sizes, though you may want more depth in larger sizes. The best part? You likely won’t need extra fabric—scraps from the main pieces should be enough. // Materials // Mini Tania Pattern Mini Tania Pocket Addition Pattern (Download Here) [Print 2 copies] No additional material needed! // Creating Pocket Pattern Pieces // Step 1: Cut out all Mini Tania paper pattern pieces in your desired size. Step 2: To create the pocket curve on the front shorts piece (1, 3, or 5), place the Pocket Addition Pattern behind it, matching the upper corners along the side seam. Trace the inner curved line onto the front piece, then cut along that line. This is your new front pattern piece. Step 3: Cut out both copies of the Pocket Addition Pattern. Cut one along the inner curved line. Label the smaller piece “7” (pocket facing) and the larger piece “8” (pocket lining). Step 4: Cut your fabric. Cut 2 of piece “7” and 2 of piece “8”, ensuring you have a right and left side for each. Pay close attention to the grainline marking so the pockets hang like the culottes. // Sewing the Pockets // Step 5: Place the pocket facing (7) and the shorts front (1, 3, or 5) right sides together, matching the raw edges of the curved pocket opening. Stitch along the curve with a 5/8″ seam allowance. Step 6: Clip the seam allowance close to the stitching without cutting into it. Then grade the seam allowance. Step 7: Open the pocket facing and shorts front, pressing the seam allowance toward the facing.Step 8: Press the pocket facing behind the front short piece. Pay particular attention to the curved pocket edge.
Step 9: Place the pocket lining (8) on top of the short front (1, 3, or 5) and pocket facing (7). Ensure the right side of the pocket lining faces the right side of the pocket facing. Match up their curved edges. Stitch the pocket bag around the curved edge using a 5/8″ seam allowance. Finish your seams as desired. Step 10: Baste the top and sides of the pocket bag to the shorts front. Step 11: Repeat Steps 5 through 10 for the other side of your culottes. Step 12: Follow the full steps for the Mini Tania pattern to assemble the remainder of your culottes. The adjustments you made should not affect the construction. Understitch as close to the seam as you are comfortable with on top of the facing and the seam allowance. And, you did it! Your little girls will be so happy to have pockets to hold all their little finds. I hope you found this tutorial helpful! Please let me know if you have any questions. I would love to help. Come say hello over on my blog Lace & Pine Designs or on Instagram @laceandpine. I love meeting