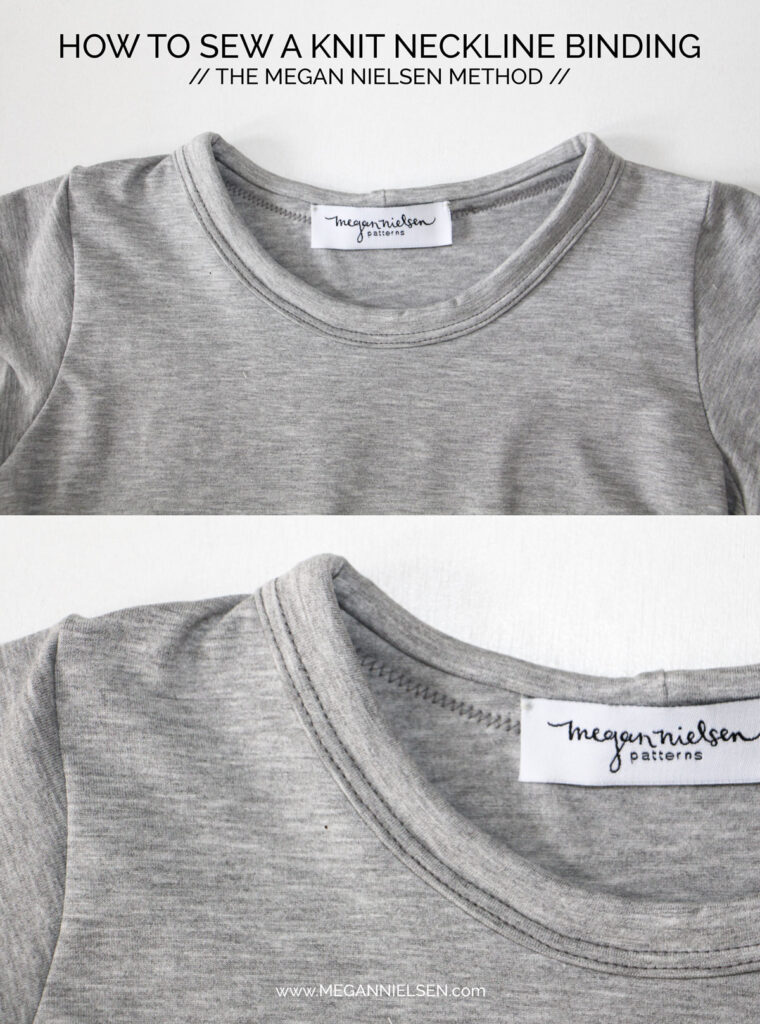
Today, I’ll be sharing my personal favorite method for finishing knit fabric necklines. I believe this technique is superior to the standard method because it fully encloses all raw edges, requires no final trimming, and adds valuable stability to lightweight, thin knits due to its sturdy construction.
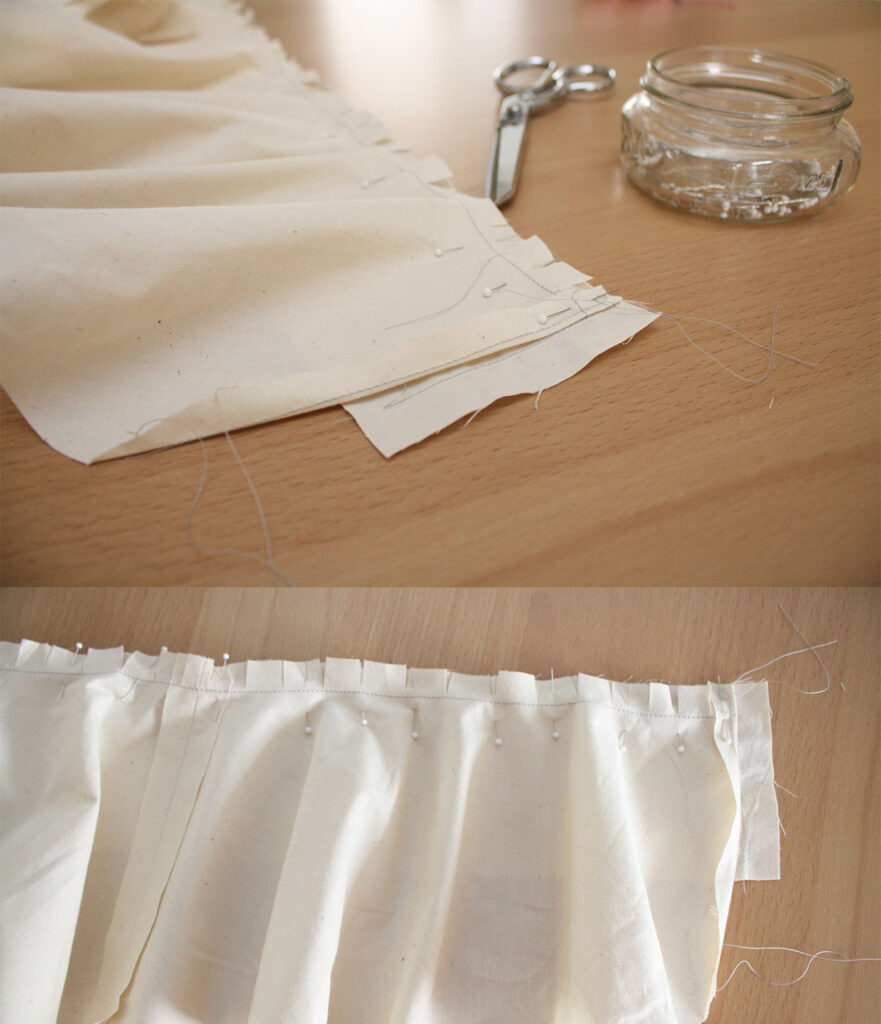
I include this specific method and the corresponding pattern pieces in my Briar and Mini Briar sewing patterns. However, you can easily adapt it to any knit sewing pattern by simply widening a standard neckline binding to approximately 3 inches (7.5cm). If you would like to compare techniques, you can view the standard knit neckline binding method in this tutorial, or learn about applying a neckline band in this tutorial. Let’s begin the process! Start with the garment’s shoulder seams sewn and pressed open or toward the back. Step 1: Fold your binding strip in half lengthwise and sew a seam 5/8 inch from the raw edge. Press this seam. Step 2: Now, fold the binding in half widthwise, enclosing the seam you just made, with the right sides facing outward. Press again. Step 3: Ensure you have marked the notches on both the garment neckline and on the binding piece. The notches on the binding are positioned halfway between the center front and center back (seam) of the binding. Step 4: Pin the raw edge of the binding to the raw edge of the neckline, aligning the notches. It is crucial to pin the binding to the wrong side of the fabric (the inside of the top). Step 5: Gently stretch the binding to fit the neckline, then sew 1/4 inch from the raw edge all the way around. You’ll find this requires less stretching than a typical neckline band. Step 6: Press the binding upward, away from the garment. Step 7: Fold the binding over the neckline edge, encasing it completely, and pin it in place. Note: Do not fold the seam allowance over; you are simply encasing the raw edge within the binding tube. Step 8: Topstitch around the entire neckline edge. Finally, press the neckline thoroughly. This final pressing is essential for setting the binding and helping it conform perfectly to the curve. As shown in my example, the binding may look a bit unusual before pressing, but it turns out perfect afterward!